Qotom WiFi Router-ready Mini-PCIf you are looking to create your own Linux home router with both ethernet and WiFi (because you’re a technical open-source computer control-freak like me), then you’ve come to the right place! My mission was to replace my aging, ailing Linksys WRT54G router which has dutifully powered our home internet for over 15 years starting when broadband internet first became available in our area (I live out in the country). The WRT54G has served as a good nat-router until recently when it started occasionally tripping (rebooting itself). I traced the pbm. to an overheating issue: Cleaned throughly inside and out, did not fix. Added a fan – this worked for a cpl. more months until it didn’t. I had installed Tomato firmware on it years ago for more control and better performance, which worked very well for what it was: 16 meg nv-ram, ancient kernel v2.4x unupgradable due to size constraints, no storage so no ability to add any other programs not embedded in the Tomato image (ethtool, for example). When it failed, I had a 2nd copy of it laying around for emergencies, but it only has the stock Linksys firmware and I was afraid to flash it w/Tomato since it’s the only router I had left, so brick it and no internet until I could replace it! Therefore, I decided to finally take the plunge and do what I had wanted to do for a long time, but couldn’t justify to myself (or wife) spending the money to buy what I really wanted: a fanless OS-free Linux-compatable minicomputer w/multiple eithernet ports AND a WiFi nic. that could function as an access point (master mode)! The other must-haves were: 1) at least 2 ethernet ports (one for internet and a second to run my desktop on which sits next to the router), 2) at least 3 USB ports (keyboard, mouse, Linux install thumbdrive simultaneously for initial setup and emergency access when I brick the firewall rules and lock myself out! Note: The keyboard and mouse have been removed and replaced with my shared USB printer now that the router is in “production”), 3) the aformentioned WiFi adapter (master mode supported in Linux)! Nice-2-haves: 1) SCSI plug to allow attaching a spinning disk if needed. |
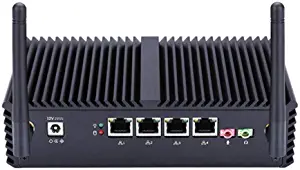
| I ended up with this little beauty: A Qotom Q330G4 Core I3-4005U which I ordered from Rack-IT Solutions on Amazon with 4 Gig of RAM, a 64 Gig SSD disk and the WiFi kit (duel antennie). It arrived early (about 3 days after I ordered it), so I unpacked it, attached it to a mouse and HDMI monitor, then realized that I had no keyboard (my 2 spares were PS/2), so a quick trip to Best Buy secured a basic no-frills USB keyboard for about $13, and fired it up. Much to my surprise, it already had PFSense installed on it, so it actually booted up! I decided to then power it back down, open the bottom of the case and plug in my “backup” hard drive containing my desktop antiX(tm) Linux into the dangling internal SCSI plug inside, poked around in the bios screen to enable it to boot first from the SCSI, and successfully booted it up to my familiar working Linux desktop environment. I then poked around to see what hardware it had (inxi -F), verified the WiFi was working (connecting to my current WiFi), etc. |
| Next step was to download 64 bit antiX (my favorite “live”, systemd-free Linux distro), “burn” it to a thumbdrive, set the bios to allow booting from that first, and booted right in. This way I could first look at the partition arrangement of the built-in SSD drive, back up it’s contents (PFSense, etc.), repartition, and install antiX Linux! I ended up creating 3 main partitions (all ext4): / (root): 40G, /home: 12G, and /var: remainder – approx. 11G. Note, I did not create any swap partition, and /home is fairly small (not really going to have users/data), at this is going to serve only as a router, not a user-computer or shared storage! |
| I then wiped the SSD with gparted, created the aformentioned partitions, installed grub into the MBR, removed the thumbdrive and SCSI spinning drive, and booted into a fresh stock antiX Linux, Buster addition and had a working desktop! |
| Now, to turn this thing into a nat-router! I had already done some research into what additional software was needed to run an actual (ethernet & WiFi) router with bridged ethernet and WiFi access point with a secure firewall, DNS, DHCP, etc. One additional requirement was setting up a shared USB printer: On my old router (no USB ports) and the ancient laser printer (USB or parallel ports but NO network option) I was using a old D-Link DP-301U “print server” (with a USB port and an ethernet port) to connect the printer to the router, but the plan was to get rid of that device and plug the printer directly into one of the new router’s USB ports and set it up directly using CUPS. My research led me to this very helpful article: “How to Build your Own Wireless Router“, namely the 2nd part of this three-part article. Essentually, I needed to install five main packages: bridge-utils, hostapd, dnsmasq, openssh-server, and firehol, “bridge” the four ethernet ports, and configure some basic things. I also deleted a ton of desktop application packages, media players, most web browsers, word-processors, etc. that I knew I wasn’t going to be using as a router. |
| I) Install essentials: bridge-utils, hostapd, dnsmasq, openssh-server, and firehol. |
| Use apt-get, synaptic or your favorite package-manager to install these and their dependencies. |
| II) Network and Bridge Setup: |
| Determine the network interface names and set up the bridge: |
| ifconfig revealed the network interfaces: eth0-3 (4 ethernet ports), wlan0 (WiFi port), and lo (Loopback). While in the learning / trial and error process of setting up the bridge, I ran into difficulty setting up eth0 as the “COM”/WAN port and someone on Google said something about eth1 being the one to have facing the internet, so I ended up going with that one as my WAN port. Looking back, I suspect that that may not be required, but since everything’s up and running, I don’t want to go back and reconfigure everything to try to see if it matters whether eth1 (or eth0 or any of the others) could be the WAN port or not, so I don’t know, but you can try it yourself if you choose. I ended up sticking with eth1 and that is what the configurations in this article assume. The one file to edit here is: /etc/network/interfaces: |
#------------------------------------------------------------------------------
# /etc/network/interfaces
#
# interfaces(5) file used by ifup(8) and ifdown(8)
# Used by ceni but not by connman
#------------------------------------------------------------------------------
auto lo
iface lo inet loopback
auto eth1
iface eth1 inet static
    address [IP address your ISP assigns to you - see your old router]
    broadcast [What your ISP assigned to you]
    gateway [What your ISP assigned to you]
    netmask [What your ISP assigned to you, pbly starts w/255.]
    network [What your ISP assigned to you]
# Bridge LAN:
auto br0
iface br0 inet static
    bridge_ports eth0 eth2 eth3
    address 192.168.[your chosen LAN subnet]
    network 192.168.[your chosen LAN subnet].0
    netmask 255.255.255.0
    broadcast 192.168.[your chosen LAN subnet].255
    post-up /usr/sbin/dnsmasq \
        -x /run/dnsmasq.$IFACE.pid \
        --dhcp-leasefile=/var/lib/misc/dnsmasq.$IFACE.leases \
        --conf-file=/etc/dnsmasq.conf \
        --interface=$IFACE \
        --dhcp-range=[your lowest DHCP address],[highest DHCP address],255.255.255.0,720m \
# Optional:   I like my DNS cache entries to last for 30 minutes (for quick web-browsing):
        --min-cache-ttl=1800
    pre-down cat /run/dnsmasq.$IFACE.pid | /usr/bin/xargs kill
# Wifi:
auto wlan0
iface wlan0 inet static
    address [same IP as bridge address (under br0 above)]
    network [same IP as bridge network (under br0 above)]
    netmask [same IP as bridge netmask (under br0 above)]
    broadcast [same IP as bridge broadcase (under br0 above)]
    post-up /usr/sbin/hostapd \
        -P /run/hostapd.$IFACE.pid \
        -B /etc/hostapd/hostapd.conf
    pre-down cat /run/hostapd.$IFACE.pid | /usr/bin/xargs kill
|
| Notes: |
| 1) If your ISP (internet service provider) uses DHCP to assign your IP and network info. then replace the first 6 lines under “auto eth1” with the single line: “iface eth1 inet dhcp”! |
2) The fields described in braces (“[]”) represent IP address values you’ll have to change / choose! Particularly, you’ll need to choose your subnet, ie. “192.168.1.*“, your router’s IP address in your subnet, ie. “192.168.1.2“, the appropriate network, netmask, and broadcast IPs, ie. “192.168.1.0“, “255.255.255.0“, and “192.168.1.255” respectively. You’ll also need to choose the range (and thus maximum number of available DHCP addresses your router can assign at one time (unless you strictly use a static network), ie. “192.168.1.100 .. 192.168.1.199” for 100 possible addresses. The
“720m” after the DHCP range is your chosen lease time in minutes (I use 12 hours), change if you wish. Everything else should remain as shown (unless your network device names differ from these). |
| 3) Until you’re ready to actually replace your router (you most likely won’t be until you have everything working properly!), you’ll probably want to back up your /etc/network/interfaces file, and copy it to two separate configuration files (I chose: interfaces.SUBROUTER AND interfaces.PROD, remove your interfaces file and symlink it to interfaces.SUBROUTER. The changes I described above will be in your “interfaces.PROD” file. In your interfaces.SUBROUTER file, set up your eth1 interface to connect instead to your existing router instead of your ISP, and use a slightly different (different 3rd number in your IP addresses) subnet; and plug your router’s WAN port into an ethernet port on your existing router (so that it will temporarily be a subrouter behind your existing router) until you get everything working properly (so that you and your family can continue to use the internet uninterrupted until everything’s ready to switch over)! We will be doing this with some other configuration files too in this article and will have a script that will switch the router to “production” mode when you’re ready to “go live” with this as your main internet router! |
| 4) Note that wlan0 and lo are NOT included in the “bridge_ports” argument – lo will NOT be part of the bridge and wlan0 will be added by the hostapd daemon automatically! |
III) Setting up SSH
(access to router from your computer via WAN, as your computer is currently on your old router’s LAN and your new (sub)router has it’s own separate LAN!): |
| Since I don’t want to leave an extra monitor, keyboard, and mouse permanently attached to my router, I’ll be accessing my router from my main computer via SSH. This involves installing OpenSSH server and setting up a public key. I prefer using a public key with a passphrase over a simple password for better security to make it nearly impossible to be hacked into from the internet! |
1) I recommend changing the port your SSH server listens on as an extra wrinkle against attackers trying to hack into your router via the default port by editing your /etc/default/ssh file and specifying a nice random five-digit port# by adding the line: SSHD_OPTS="-p #####". |
| 2) Create your public key (on your main computer) using the ssh-keygen program. It will prompt you for the needed information. Simply accept the default values, but enter a strong passphrase (like a password) when prompted. |
| 3) Copy the key over to the router using the command: |
ssh-copy-id -p <your chosen SSH port> <router's login user-id>@<router's host name or IP address> |
| You will be prompted for that user’s password. NOTE: When you installed Linux on the router machine, you should have set up root (password) and a non-privileged user-account and password. This is the unprivileged user-account and password you’ll use when logging directly into the router itself. This should copy your newly-created public key file over to the router as /home/[router’s login user-id]/.ssh/ |
| 4) I recommend setting up the ssh server daemon to NOT allow root login or simple password authentication (for extra security, since your router will be facing the world wild web)! To do this: a) Edit /etc/ssh/sshd_config (on the router): Make sure the lines: “PermitRootLogin no” and “PasswordAuthentication no” are present and uncommented. b) Edit /etc/ssh/ssh_config (on the router): Make sure the lines “PasswordAuthentication no” and “PermitRootLogin no” are present there too and uncommented. Comment (#) out the line “GSSAPIAuthentication yes“. I also added the lines: “Protocol 2“, “ForwardX11 yes“, “ControlMaster auto“, “ControlPath /tmp/ssh-%r@%h:%p“, and “AddressFamily inet“. These force usage of the modern protocol, allow you to run X (graphic) apps on your router on your computer’s monitor, and improve speed and efficiency in your SSH connections (see https://tychoish.com/post/9-awesome-ssh-tricks/ for more info on these last two). |
| When finished, on your router, you should have the file “/home/[router’s login user-id]/.ssh/authorized_keys containing the public key you created in steps 3 & 4 above. On your main computer in /home/[you]/.ssh/: id_rsa and id_rsa.pub (the latter containing your public key, the same as in your router’s authorized_keys file. |
| To open a terminal window to your router, use the command: “xterm -e ssh -X <router> -l <user> -p ##### &” where “router” is the name you created in your computer’s /etc/hosts file for your router’s assigned IP address, “user” is the aformentioned login user-id you created on your router when you installed Linux, and ##### is your chosen port# you added to your router’s “/etc/default/ssh” file in step 2 above. If you created your public key with a passphrase (as you should have!) you will be prompted to enter it. |
| While we’re at it, let’s go ahead and set up the ability to run X apps on the router remotely on our computer’s monitor (since we plan to normally run the router headless): To do this you’ll need to set it up by following the instructions on this site: https://www.simplified.guide/ssh/x11-forwarding-as-root Then I created this handly little script which I invoke twice when SSH-ing into the router (if I plan to run an X app): once when I login as user, then again after su’ing to root (it’s a two-step process). Create this script and make it user-executable in /usr/local/bin/ on the router: |
#!/bin/bash
#JWT:THIS SCRIPT I WROTE ALLOWS INVOKING X APPS AS SUDO ROOT FROM
#AUTHORIZED REMOTE HOSTS:
#TO USE, SSH IN AS DESIGNATED USER, INVOKE THIS SCRIPT, THEN SUDO ROOT,
#THEN INVOKE THIS SCRIPT AGAIN!
#IDEA CAME FROM:   https://www.simplified.guide/ssh/x11-forwarding-as-root
if [ "X$HOME" = "X/root" ]; then
    #2ND RUN (AFTER SUDO ROOT):
    XIT=`cat /home/[user]/.xit`
    xauth add $XIT
    export DISPLAY=localhost:10.0
    echo "..Step 2 of 2 complete."
else
    #1ST RUN (AS USER BEFORE SUDO ROOT):
    xauth list $DISPLAY >/home/[user]/.xit
    echo "..Step 1 of 2 complete."
fi
|
| IV) Setting up nat and firehol (firewall): |
I had planned to wait and worry about firewall setup at the end when I had
everything else working on the (sub)router (as my router already has a firewall), but I learnt that one must set up some firewall (iptables) stuff before we can even nat! Therefore I’ll cover that next. |
| 1) Enable basic nat forwarding: Back up your existing /etc/sysctl.conf file! Then edit it and search for the following lines, and change each value to “1” (or add any which don’t already exist), as shown below: |
net.ipv4.conf.default.rp_filter = 1
net.ipv4.conf.all.rp_filter = 1
net.ipv4.ip_forward = 1
net.ipv4.conf.default.accept_redirects = 1
net.ipv4.conf.all.accept_redirects = 1
net.ipv4.conf.default.send_redirects = 1
net.ipv4.conf.all.send_redirects = 1
net.ipv4.conf.default.accept_source_route = 1
net.ipv4.conf.all.accept_source_route = 1
|
| NOTE: I only use ipv4. If you’re going to use ipv6 also, there may be others, but that’s beyond the scope of this article. |
| 2) For better performance, I also added the following additional lines to my /etc/sysctl.conf file for routing (I commented the existing default values these fields had before these changes – you can see the system’s default value for a given parameter, ie. “net.core.default_qdisc” by doing a “cat /proc/sys/net/core/default_qdisc” command from a terminal – note changing the dots to slashes and prepending “/proc/sys/“): |
net.ipv4.ip_nonlocal_bind = 1
net.ipv4.ip_dynaddr = 1
#net.core.default_qdisc WAS pfifo_fast (use cake or fq_codel, if possible)!
#NOTE: you'll likely want to use "cake" in lieu of "fq_codel" below, if you have a recent kernel.
net.core.default_qdisc = fq_codel
#net.ipv4.tcp_congestion_control WAS cubic
#NOTE: you'll want to use "bbr2" in lieu of "bbr" below, if you have a recent kernel.
net.ipv4.tcp_congestion_control = bbr
#net.core.somaxconn WAS 128
#We ARE a router, so we'll need to allow more tcp connections!:
net.core.somaxconn = 512
#net.ipv4.tcp_max_syn_backlog WAS 128
net.ipv4.tcp_max_syn_backlog = 256
net.ipv4.tcp_syncookies = 1
net.ipv4.tcp_ecn = 1
|
| I also changed the following lines to better (for me, imho) values (You’ll pbly want to set your Linux computers with these tcp values too): |
kernel.dmesg_restrict = 1
net.ipv4.tcp_tw_reuse = 1
net.ipv4.tcp_fin_timeout = 20
net.ipv4.tcp_keepalive_time = 180
net.ipv4.tcp_keepalive_intvl = 30
net.ipv4.tcp_keepalive_probes = 5
net.core.netdev_max_backlog = 2048
net.ipv4.tcp_orphan_retries = 1
#WE HAVE NO SWAP PARTITION AND 4 GIGS OF RAM:
vm.swappiness = 0
net.ipv4.tcp_retrans_collapse = 1
net.ipv4.tcp_sack = 1
net.ipv4.tcp_fack = 1
net.ipv4.tcp_slow_start_after_idle = 0
net.ipv4.tcp_rfc1337 = 1
#THESE SEEM TO WORK BEST FOR OUR LOW-BANDWIDTH/LOW-LATENCY INTERNET CONNECTION (YMMV):
#SEE:   https://www.speedguide.net/analyzer.php
#(WHICH RECOMMENDS 128480 FOR *OUR* SPEED, BUT ASSUMES HIGHER 200ms+ LATENCY THAN WE HAVE):
net.core.rmem_default = 64240
net.core.wmem_default = 64240
net.core.rmem_max = 2055680
net.core.wmem_max = 2055680
#THE MIN. (1ST) VALUE ALLOWS 3 PACKETS (3xMSS):
#DON'T REMEMBER HOW I CALCULATED THE MAX (3RD) VALUES, BUT THEY'VE WORKED GREAT FOR YEARS FOR ME:
net.ipv4.tcp_rmem = 4380 64240 2055680
net.ipv4.tcp_wmem = 4380 64240 2055680
#SEE:   https://blog.cloudflare.com/http-2-prioritization-with-nginx/
net.ipv4.tcp_notsent_lowat = 16384
net.ipv4.tcp_fastopen = 3
|
| 3) Run “sysctl -p” command to update to the new values. |
| 4) Firehol (firewall): Nat routing also requires some iptables foo, so we’ll go ahead and set up the firewall now. Firehol was reccommended by the article and proved to be an excellent program for setting this up quickly! Back up your default /etc/firehol/firehol.conf file, and then move it to /etc/firehol/firehol.conf.PROD. Edit /etc/firehol/firehol.conf.PROD to look like the following (sans the preexisting comments): |
version 6
# Accept all client traffic on WAN
interface eth1 wan
    client all accept
# Accept all traffic on LAN
interface br0 lan
    server all accept
    client all accept
# Route packets between LAN and WAN
router lan2wan inface br0 outface eth1
    masquerade
    route all accept
|
| 5) Now copy /etc/firehol/firehol.conf.PROD to /etc/firehol/firehol.conf.SUBROUTER and symlink /etc/firehol/firehol.conf to point to it. Add the following to the “.SUBROUTER” version just above the first line above (replacing [your subnet#] with the 3rd number in your OLD router’s LAN subnet). This will allow you to access your new router from your computer (via SSH) on your existing LAN while you are tesing your new router as a subrouter, which is currently on a separate LAN (your computer is currently seen by your router as being outside on the “internet”). NOTE: Make sure these are NOT in your firewall setup when you put your router into production! |
| 6) Now we would edit /etc/default/firehol and make sure START_FIREHOL=NO is set (to NOT start firehol at startup), but the latest version of firehol doesn’t seem to want to be started (manually) with this set, so I had to create the subdirectories: /etc/NOrc3.d/ and /etc/NOrc5.d/, then move /etc/rc3.d/S03firehol and /etc/rc5.d/S03firehol respectively to these new subdirectories in order to prevent firehol from starting on startup and allow us to start it manually (we will ultimately start it manually in /usr/local/bin/rc_local.pl – see section VII below). NOTE: If you’re using systemd, then you will instead have to turn off the firehol service however systemd does it! |
interface eth1 trusted src 192.168.[your computer's current subnet#].0/24
    server all accept
    client all accept
|
| 7) Run the following command (as root on the router) to start your firewall: |
/usr/sbin/firehol start
|
| Firehol will generate a rather robust firewall for you consisting of over a hundred iptables rules and will block incoming connections not initiated by an outgoing connection! When all said and done (including setting up ssh), we’ll make this auto-start, but for now, we’ll start the firewall manually for safety. You might also want to test your firewall from your computer while it and your new router are on your old router (your new router’s “WAN”)! |
| TEST: You should now be able to plug your router’s WAN port into one of the LAN ports on your existing router, reboot, and have internet access on your new router’s ethernet ports itself (through your old one) as if you were another computer on your lan. If this fails, you need to check your configuration file and (/etc/network/interfaces.SUBROUTER, and eth1 should be configured for your existing router’s subnet, NOT your ISP’s) and make sure you have /etc/network/interfaces symlinked to it. |
| When all said and done (including setting up ssh), we’ll make this auto-start, but for now, we’ll start the firewall manually for safety. |
| V) Configure hostapd (you did install it already, no?): |
I created an 80211g/n network as this is what my router’s wireless nic. and the common denominator supported by all my WiFi devices. If you can and wish to create an a/c network instead, set these instead to more appropriate values for your network.
|
| Backup your original /etc/hostapd/hostapd.conf file and make the following edits:
1) Uncomment the “bridge=” line and set it to “bridge=br0“.
2) Uncomment the “driver=” line and set it to “driver=nl80211“.
3) Uncomment the “ssid=” line (if commented) and set to your preferred network SSID string.
4) Uncomment the “country_code” line and set to your two-letter country code (ie. “US” for the U.S.A.).
Yes, we expecially want to be legal here because if unset, your WiFi transmition and channel choices will likely be limited to a restrictive “common-denominator” of values!
|
| 5) Uncomment the “ieee80211d=1” line (for better WiFi support within the limits of your country). |
| 6) Set the “channel=” line to your preferred channel, as needed for your network (but different from your current router while this is still a subrouter! |
| 7) (My preference, for efficiency): I change the “beacon_int=100” to 1000 (1 beacon sent per second), and the “dtim_period=2” line to 1. |
| 8) (My preference, but not required): I change the “rts_threshold=-1” and “fragm_threshold=-1” lines to 2347 and 2346 respectively. |
9) I initially set the “macaddr_acl=0” line to 1 and set up a mac filter file for better WiFi security, but was forced to abandon usage of mac-filtering due to a couple of recent “iCrap” (Apple) devices obtained by my family which insist on RANDOMIZING THEIR MAC-ADDRESSES! These devices can be told to NOT randomize their mac-addresses for SPECIFIC networks (SSIDs), but this does not work either (since I’m not broadcasting a SSID, so Apple assumes the “unknown network”). After a bunch of googling and T&E, I found some Apple documentation that in many words said that Apple will “allow” (play nice with) networks with either a non-broadcast SSID -OR- a mac-filter, but NOT both (unless you turn off the randomized mac-addresses on your Apple device for ALL networks, which defeats THEIR security when connecting to public networks (which I did not want to force my loved ones to do, for their own safety when they access public WiFi networks)! I opted to retain an unbroadcasted SSID and surrender the mac-filter, so in a way, Apple is now dictating terms of MY network security.  If you don’t have any of these borish devices and want to have a mac-filter, set this line to 1, and uncomment and set the “accept_mac_file=” line to your mac-filter file. If you don’t have any of these borish devices and want to have a mac-filter, set this line to 1, and uncomment and set the “accept_mac_file=” line to your mac-filter file. |
| 10) I recommend changing the “auth_algs=” line from 3 to 1 for Shared key authentication and NOT allow open system authentication. |
| 11) I recommend uncommenting the line “ignore_broadcast_ssid=” line and setting to 1 to prevent publicly broadcasting your SSID to your neighbors for a little bit more WiFi security (a hacker with a packet sniffer can find it, but I doubt any of your neighbors are that sophisticated)! |
| 12) Uncomment the “wmm_enabled=1” and “ieee80211n=1” lines to allow for higher 80211n speeds (otherwise you’re basically limited to an 80211g network: 54Mbps max.). With my configuration, I’m seeing WiFi speeds of (up to) 160Mbps so far – way higher than my slow 20th-centuryish rural 6Mbps “broadband” internet connection – but w/Cake, my TCP settings & other optimizations, I do get the absolute most out of it!). |
| 13) Run the command “iw list” on your router to determine the “Supported extended features” of your access point nic., which you can then uncomment the “ht_capab=” line to fully support your access point’s capabilities, but read the comments carefully just above this line first! NOTE: Mine includes “HT-greenfield” support ([GF]), so I would’ve added that, but you should not include this one unless ALL your WiFi devices also support it, otherwise performance may degrade. |
| 14) Uncomment the “wpa=2” and “wpa_passphrase=” line and set the latter to your chosen secure WiFi passphrase! |
| 15) Uncomment the “wpa_key_mgmt=” line and set to “WPA-PSK“. |
| 16) Uncomment the “wpa_pairwise=” and “rsn_pairwise=” lines and set both to “CCMP” (I recommend leaving TKIP off as it is older and less secure – SEE: https://help.keenetic.com/hc/en-us/articles/213968749-Ways-to-increase-connection-speed-bandwidth-and-stability-of-your-Wi-Fi-network). |
| These settings should provide you a fast and secure 80211g/n WiFi access point accessable from both Windows 7, 10, 11, Apple, and Linux devices. I can not speak on 80211a/c networks, as my access point and some devices here do not support it. |
| 17) Now copy your /etc/hostapd/hostapd.conf file to /etc/hostapd/hostapd.conf.SUBROUTER, and them MOVE /etc/hostapd/hostapd.conf to /etc/hostapd/hostapd.conf.PROD, and symlink /etc/hostapd/hostapd.conf to /etc/hostapd/hostapd.conf.SUBROUTER (we’re still testing as a subrouter for now). Edit /etc/hostapd/hostapd.conf.SUBROUTER and change your ssid, channel, and wpa_passphrase to something DIFFERENT so that it doesn’t clash with your current router while you test everything out. You might also wish to broadcast your SSID while testing. |
| 18) Now we’ll have to prevent hostapd from starting up when the system boots (we need it to wait until the network is up, so we start it up in /etc/network/interfaces). Unfortunately, there is no option to disable hostapd in /etc/default/hostapd! Therefore, I had to move /etc/rc3/S02hostapd and /etc/rc5/S02hostapd to /etc/NOrc3.d/ and /etc/NOrc5.d/ respectively (that we created in section IV, part 6 above). NOTE: If you’re using systemd, then you will instead have to turn off the hostapd service however systemd does it! |
| 19) I ran to an ugly issue trying to get my regulatory domain set where hostapd and the wireless interface would recognize it (and operate at the full 30 watts, as allowed in the USA with 80211n speeds). You can check to see if you have this issue by entering the command as root: iw reg get. If you get your country code back and a proper list of channels and power, then you’re good, and can skip on down to part VI below. Otherwise, this will take some more work. If you get something else like “00” “–” “unregulated”, etc. you’ll need to read on!: I’m not sure what the issue is but for me it ended up being that the two regulatory database files (/lib/firmware/regulatory.db*) were corrupt and not being loaded (dmesg will show an error like “failed to load regulatory database” or something similar (sudo dmesg | grep -i “regul”). These come from the package: wireless-regdb and, in debian-based distros like AntiX, are symlinked back around to corresponding files: /lib/firmware/*-debian, which seem to NOT work?! I ended up having to install them from github by creating an empty directory (as root): /tmp/wireless-regdb/; cd /tmp; running the command: git clone git://git.kernel.org/pub/scm/linux/kernel/git/sforshee/wireless-regdb.git wireless-regdb; cd /tmp/wireless-regdb; renaming the two symlinks (/lib/firmware/regulatory.db*); copying the too files: /tmp/wireless-regdb/regulatory.db and /tmp/wireless-regdb/regulatory.db.p7s over to /lib/firmware/, making sure they were owned by root with permissions 644. Then, create or edit /etc/modprobe.d/cfg80211.conf with the line: “options cfg80211 ieee80211_regdom=US” (replace “US” with your two-letter country-code)! Now reboot the router and verify the proper domain is set (iw reg get), sudo dmesg | grep -i “regul” returns no errors, and run iw list shows the proper channels, frequencies, and power. |
| VI) Setting up DNS and DHCP (dnsmasq): |
| Now, we need to set up DNS (so we can use the internet, cache DNS lookups), and (optionally) hand out DHCP leases to devices connecting to our access point – IF you’re allowing for dynamic IP addresses. |
| 1) Backup and edit /etc/dnsmasq.conf and uncomment / add / edit the following lines (see the comments in the file and / or the dnsmasq manpage for details on what these do): |
domain-needed
bogus-priv
filterwin2k
resolv-file=/etc/resolv.dnsmasq
no-poll
except-interface=eth1
addn-hosts=/etc/hosts.dnsmasq
expand-hosts
#Set next to max. number of concurrent DHCP user-leases (same as your "--dhcp-range" setup in /etc/network/interfaces:
dhcp-lease-max=#
dhcp-authoritative
dhcp-rapid-commit
#optional:
cache-size=2048
local-ttl=1800
domain=[your-chosen-domain-name.org]
#IF you have Windows-7 devices on your network, add / uncomment these last two:
dhcp-option=252,"\n"
#NOTE:   below is 1i (ONEi) not li (lower-Li)!:
dhcp-option=vendor:MSFT,2,1i
|
| 2) Create or edit the file /etc/resolv.dnsmasq to contain the same lines you use in your computer’s /etc/resolv.conf file (likely the IP address of your current router), ie.: |
options timeout:2
nameserver [your old router's IP]
|
| 3) Rename this file to /etc/resolv.dnsmasq.SUBROUTER and symlink /etc/resolv.dnsmask to it. |
| 4) Copy /etc/resolv.dnsmasq.SUBROUTER to /etc/resolv.dnsmask.PROD, edit the latter changing it’s contents to the same as what’s in your current router’s /etc/resolv.conf file (whatever you currently use for DNS servers). ie.: |
options timeout:2
nameserver [your ISP's primary DNS server IP]
nameserver [your ISP's secondary DNS server IP]
|
| 5) Backup and edit /etc/resolv.conf and set it to contain the single line (This forces DNS to go through dnsmasq, which will use /etc/resolv.dnsmasq for the actual nameservers. You should eventually set all your devices’ DNS lookup nameservers to be the IP address of your router, if this isn’t already the case, as it will consolidate all DNS on your network and take advantage of your router’s caching of DNS looks thus speeding up everyone’s web browsing!): |
nameserver 127.0.0.1
|
| 6) You will probably need to update your /etc/hosts file to make sure 127.0.0.1 points to both localhost and your router’s hostname. |
| 7) Now we’ll have to prevent dnsmasq from starting up when the system boots (we need it to wait until the network is up). Therefore, edit /etc/default/dnsmasq and make sure “ENABLED=0” is set to prevent dnsmasq from starting up when the system boots (we need it to wait until the network is up, so we start it up in /etc/network/interfaces). I can’t remember why now, but I also ended up moving /etc/rc3/S03dnsmasq and /etc/rc5/S03dnsmasq to /etc/NOrc3.d/ and /etc/NOrc5.d/ respectively (that we created in section IV, part 6 above), though this may be unnecessary here? NOTE: If you’re using systemd, then you will instead turn off the dnsmasq service however systemd does it! |
| VII) Setting up bandwidth-management, traffic shaping, and removing buffer-bloat: |
| I live in a rural area of the U.S.A. where we only have very limited choices for internet (unless you want to spend big bucks). Therefore, my “broadband” internet is only 6Mbps down, 2Mbps up. Despite the paltry bandwidth my ISP does a pretty good job of actually delivering these rates pretty steadily and continuously! With these settings, I’m able to make the most of my bandwidth, being able to stream Sling-TV at 720p while streaming music and surfing the web without any lag while my wife is on a Skype call in her home-office and using the web all at the same time! Even if you are like most others blessed to have real broadband (25-100Mbps+), you’ll still want to implement this basic bandwidth-management and traffic shaping in order to minimize bufferbloat / lag as these can affect the fastest of internet connections when multiple users are using the internet simultaneously. For example my mum has cable-internet boasting 50Mbps down, but her cable modem is so bufferbloated that it’s actually noticably laggier and “slower” than mine! Their speed is also a lot less consistant as it starts off new connections fast, but quickly throttles them back down to 6-8Mbps. |
If you have a recent kernel installed on your router, you’ll want to configure “Cake” and limit your WAN bandwidth (both up and down, or at least up) to just below your actual provisioned bandwidth (if you have any latency / bufferbloat issues – see dslreports.com and the ping command)! What this will do is move the “chokepoint” from your ISP’s edge equipment to YOUR Linux router where YOU can control the traffic flow and buffering! This is particularly critical if using a (usually very over-bufferbloated) cable-modem. Fortunately, my ISP uses an antenna on my roof containing a small router box that converts their over-the-air broadband to ethernet into my house (my router), which already seems configured with minimum buffering, as the DSLReports speedtest (dslreports.com) consistantly shows bufferbloat grades of A+ and speeds of 6.3Mbps down and 2.2-2.4Mbps speeds up (with just my old stock Linksys WRT54G router). To use Cake, make sure the line “net.core.default_qdisc = cake” exists in /etc/sysctl.conf and is set to “cake“. You can test whether your kernel supports Cake by trying “modprobe sch_cake“. Note: I ended up later removing the bandwidth limiting as I was already getting “A+” bufferbloat scores from dslreports.com and good Skype calls without them (I was only giving up bandwidth unnecessarily, but if you have a bufferbloated ISP-supplied device just above you, this should help you get much better results (particularly if you have more bandwidth to work with)! I did keep the other cake settings, the byte_queue_limits and all the other code though for optimization, traffic-management and bufferbloat-removal! You can also try just removing the download limiting while retaining the upload part (see the comments), as this might still help with any latency. |
| I normally run most of my custom configurations and tweaks from a Perl script I create as /usr/local/bin/rc_local.pl. To do this, you’ll need to edit /etc/rc.local to include the following code: |
if [ -x /usr/local/bin/rc_local.pl ]; then
    /usr/local/bin/rc_local.pl &
fi
|
| Then, after creating /usr/local/bin/rc_local.pl with at least the following code (NOTE: This is for MY 6/2Mbps internet connection and network configuration (using cake), so you’ll need to adjust for yours. If your ISP uses PPOe or ASDL to connect you, be sure and see “man tc-cake” (manpage) for setting proper packet overhead bytes, etc!): (SEE https://www.bufferbloat.net/projects/codel/wiki/Best_practices_for_benchmarking_Codel_and_FQ_Codel/#enabling-byte-queue-limits, https://www.bufferbloat.net/projects/codel/wiki/Cake/, https://wiki.gentoo.org/wiki/Traffic_shaping and https://www.bufferbloat.net/projects/codel/wiki/CakeTechnical/) tl;dr |
#!/usr/bin/perl
#OPTIMIZE NETWORK INTERFACES (eth1 is WAN port, eth0, 2, 3 are LAN, wlan0 is WiFi access point):
foreach (my $i=0;$i<=3;$i++) {
    `/usr/sbin/tc qdisc delete root dev eth$i`;
    `/sbin/ethtool -G eth$i rx 80 tx 80`;  #SET TO >=16 AND AS LOW AS IT ALLOWS.
    `/sbin/ethtool -K eth$i tso off gso off gro off`;
    `/sbin/ifconfig eth$i txqueuelen 1`;   #DEFAULT 1000.
    if ($i == 1) {  #OUTWARD (WAN) INTERFACE:
        for (my $j=0;$j<=1;$j++) { #MY ETHERNET DEVICES HAVE 2 HARDWARE QUEUES:
            `echo 1514 > /sys/class/net/eth$i/queues/tx-$j/byte_queue_limits/limit_max`;
        }
        #NOTE: THIS WILL LIMIT UPLOAD RATE TO 2.2Mb/s (JUST BELOW OUR PROVISIONED RATE):
        #(IF YOU DON'T WANT UPLOAD RATE LIMITED, REMOVE "bandwidth 2200kbit" -
        #IN NEXT LINE AND COMMENT REMAINING LINES IN THIS BLOCK).
        #IF BUFFER-BLOAT OR LAG PERSIST, TRY LOWERING TO 90-95% OF BANDWIDTH, THOUGH CAKE
        #SEEMS TO APPLY THAT TO THE SPECIFIED LIMIT ANYWAY (EXPERIMENT).
        `/usr/sbin/tc qdisc add dev eth1 root cake bandwidth 2200Kbit nat ethernet`;
        #(IF DOWNLOAD RATE LIMITING DESIRED, UNCOMMENT OUT REMAINING CODE LINES IN BLOCK):
        #(I HAVEN'T FOUND THIS TO MAKE THAT MUCH DIFFERENCE):
        #NOW SET UP INGRESS INTERFACE eth1_ifb FOR DOWNLOAD RATE-LIMITING:
        #THIS WILL LIMIT DOWNLOAD RATE TO 6.2Mb/s: (JUST BELOW OUR PROVISIONED RATE)
        #EFFECTIVLY MOVING ANY BOTTLENECK HERE (WHERE WE CAN CONTROL)!
        #(from: https://www.bufferbloat.net/projects/codel/wiki/Cake/)
        #`/usr/sbin/ip link add name eth1_ifb type ifb`;
        #`/usr/sbin/tc qdisc add dev eth1 handle ffff: ingress`;
        #`/usr/sbin/tc qdisc add dev eth1_ifb root cake bandwidth 6200Kbit nat ethernet`;
        #`/usr/sbin/ip link set eth1_ifb up`;
        #`/sbin/ifconfig eth1_ifb txqueuelen 1`;
        #`/usr/sbin/tc filter add dev eth1 parent ffff: matchall action mirred egress redirect dev eth1_ifb`;
        #`echo 3028 > /sys/class/net/eth1_ifb/queues/tx-0/byte_queue_limits/limit_max`;
    } else {  #INWARD (LAN) INTERFACES:
        for (my $j=0;$j<=1;$j++) { #WE HAVE 2 TX QUEUES:
            `echo 3028 > /sys/class/net/eth$i/queues/tx-$j/byte_queue_limits/limit_max`;
        }
        `/usr/sbin/tc qdisc add root dev eth$i cake ethernet metro`;  #METRO=RTT 10ms (LOCAL)
    }
}
#NOW SET UP WiFi (mine has 4 queues):
for (my $j=0;$j<=3;$j++) {
    `echo 3028 > /sys/class/net/wlan0/queues/tx-$j/byte_queue_limits/limit_max`;
}
`/sbin/ifconfig wlan0 txqueuelen 8`;   #SEEMS TO NEED MORE BUFFERING HERE.
`tc qdisc delete root dev wlan0`;
`tc qdisc add root dev wlan0 cake diffserv4 metro`;  #MIRROR HOSTAPD WHICH SETS UP 4 QUEUES.
#DON'T NEED AN EXTRA QUEUE ON THE BRIDGE!:
`/sbin/ifconfig br0 txqueuelen 0`;
#THIS SEEMS TO WORK BEST (SNAPPIER WEB-PAGE LOADS) - DEFAULT WAS 10 AND 10 *** SET YOUR GATEWAY IP! ***:
`/sbin/ip route change default via $ENV{GATEWAYIP} proto static initrwnd 20 initcwnd 20`;
#NOW START UP FIREWALL HERE (INSTEAD OF IN INIT.) NOW THAT THE NETWORK INTERFACES ARE ALL UP:
if (-e '/etc/firehol/firehol.conf' && -x '/usr/sbin/firehol') {
    `/usr/sbin/firehol start`;
}
#IF YOU WANT TO INSTALL AND USE FIREQOS TRAFFIC PRIORITY, UNCOMMENT (BUT I THINK IT REQUIRES
#THE OLDER FQ-CODEL, INSTEAD OF CAKE, WHICH SEEMS TO WORK FINE FOR US WITHOUT NEEDING THIS):
#I TRIED IT BEFORE SETTING UP CAKE AND 95%+ OF MY TRAFFIC STILL WENT INTO SAME QUEUE, YMMV,
#BUT YOU MIGHT HAVE TO SET UP COMPLEX DSCP PACKET MARKING TO GET MUCH OUT OF IT!:
#if (-e '/etc/firehol/fireqos.conf' && -x '/usr/sbin/fireqos') {
#    `/usr/sbin/fireqos start`;
#}
#KILL USELESS PROCESSES (THAT SEEM TO BE FORCED ON DURING BOOTUP BUT NOT NEEDED AFTER):
`/usr/bin/killall startpar`;
`/usr/bin/killall elogind-daemon`;
`/usr/bin/killall dbus-daemon`;
exit (0);
|
| ***** (Here’s the equivalent bandwidth-limiting code if you are using htb and fq_codel instead): ***** |
#NOTE: THIS WILL LIMIT UPLOAD RATE TO 2.1Mb/s (OUR PROVISIONED):
# UNCOMMENT NEXT 10 TO LIMIT DOWNLOAD BANDWIDTH (I HAVEN'T FOUND THIS TO MAKE THAT MUCH DIFFERENCE):
#`/usr/sbin/tc qdisc add dev eth1 handle ffff: ingress`;
#`/usr/sbin/ip link add name eth1_ifb type ifb`;
#`/usr/sbin/ip link set eth1_ifb up`;
#`/sbin/ifconfig eth1_ifb txqueuelen 1`;   #DEFAULT 32.
#`/usr/sbin/tc filter add dev eth1 parent ffff: matchall action mirred egress redirect dev eth1_ifb`;
#`/usr/sbin/tc qdisc add dev eth1_ifb root handle 1: htb default 11`;
#`/usr/sbin/tc class add dev eth1_ifb parent 1: classid 1:1 htb rate 6200kbit`;
#`/usr/sbin/tc class add dev eth1_ifb parent 1:1 classid 1:11 htb rate 6200kbit prio 0 quantum 1514`;
#`/usr/sbin/tc qdisc add dev eth1_ifb parent 1:11 fq_codel quantum 300 limit 1024 ecn`;
#`echo 3028 > /sys/class/net/eth1_ifb/queues/tx-0/byte_queue_limits/limit_max`;
# LIMIT UPLOAD BANDWIDTH:
#(from:   https://wiki.gentoo.org/wiki/Traffic_shaping)
`/usr/sbin/tc qdisc add dev eth1 root handle 1: htb default 11`;
`/usr/sbin/tc class add dev eth1 parent 1: classid 1:1 htb rate 2100kbit`;
`/usr/sbin/tc class add dev eth1 parent 1:1 classid 1:11 htb rate 2100kbit prio 0 quantum 1514`;
`/usr/sbin/tc qdisc add dev eth1 parent 1:11 fq_codel quantum 300 limit 1024`;
for (my $j=0;$j<=1;$j++) { #WE HAVE 2 TX QUEUES:

      `echo 3028 > /sys/class/net/eth1/queues/tx-0/byte_queue_limits/limit_max`;

}
|
| With these settings and those in /etc/sysctl.conf, I get 14-25ms ping times and fast web-page loads, and clear Skype calls regardless on internet load, and no bufferbloat! |
| VIII) Misc. system configuration changes (ymmv): |
| 1) /etc/gai.conf: Since I only use ipv4, I uncommented the line “precedence ::ffff:0:0/96 100” per https://askubuntu.com/questions/32298/prefer-a-ipv4-dns-lookups-before-aaaaipv6-lookups. |
| 2) /etc/inittab: Since I don’t plan to leave a monitor, keyboard, etc. attached to my router (headless), I can save a ton of memory and resources by NOT starting up X on bootup, so I changed the default runlevel from 5 (graphics/X) to 3 (console) in /etc/inittab and reduced the number of getty consoles from 6 to just 2. You can still run X apps. on your computer’s monitor over SSH without X running on the router, and you can always hook up a monitor, mouse and keyboard, and manually start slim/X or manually switch runlevels back to 5 to do so (“sudo init 5“) when and if needed. |
3) /etc/default/console-setup: Make console font small enough to see bootup messages and reduce number of getty consoles from 6 to 2: ACTIVE_CONSOLES="/dev/tty[1-2]", FONTFACE="VGA" and FONTSIZE="8x16". |
4) /etc/default/grub: Be sure to set GRUB_SAVEDEFAULT=true (so router always boots up in previous kernel by default, since we’ll be running headless). I also added “quiet nosplash ipv6.disable=1 mitigations=off” to the GRUB_CMDLINE_LINUX_DEFAULT= string (since we’ll run headless, won’t be running a web browser to surf dodgy sites on the router, won’t be running any untrusted software (better speed), and I don’t care to bother with ipv6). |
| IX) Switching from Testing (subrouter) to Production (main router) (and back): |
| If you’ve been following these instructions, there are at least four files for which we have set up separate “test” and “production” versions, with the actual file used symlinked to one or the other of the pairs (make sure each is currently sublinked to it’s corresponding .SUBROUTER version)! Depending on your environment and setup needs, you may wish to create such pairs for additional config. files, such as /etc/hosts, /etc/environment, etc. (and add them to the /usr/local/bin/switchroute.sh script below): |
/etc/resolv.dnsmasq
/etc/network/interfaces
/etc/hostapd/hostapd.conf
/etc/firehol/firehol.conf
|
| For each of these, we created a *.SUBROUTER and a *.PROD version for each and symlinked each to it’s corresponding SUBROUTER version, ie: /etc/resolv.dnsmasq => /etc/resolv.dnsmasq.SUBROUTER. Now we need to create a script to switch between the two. As a test setup, we have the new router set up with a different sublink, WiFi channel, etc. and connected behind our old main router (so everyone else in the house could continue using the internet uninterrupted during our setup and testing process. Now (assuming you’ve followed the instructions and set everything up properly for your environment, tested, and everything seems to be working: you tested ethernet, firewall, WiFi connectivity and speed, etc.), and you are ready to make the big switchover, I’ve created a simple script to run (as root), followed by reconnecting your new router directly to your internet and removing your old router. I call it /usr/local/bin/switchroute.sh: |
#!/bin/bash
if [ "X$HOME" = "X/root" ]; then
    if [ "X$1" = "XTEST" ]; then
        echo "--Reconfiguring as TEST (subrouter) (REBOOT required)!..."
        rm -f /etc/resolv.dnsmasq
        ln -s /etc/resolv.dnsmasq.SUBROUTER /etc/resolv.dnsmasq
        rm -f /etc/network/interfaces
        ln -s /etc/network/interfaces.SUBROUTER /etc/network/interfaces
        rm -f /etc/firehol/firehol.conf
        ln -s /etc/firehol/firehol.conf.SUBROUTER /etc/firehol/firehol.conf
        rm -f /etc/hostapd/hostapd.conf
        ln -s /etc/hostapd/hostapd.conf.SUBROUTER /etc/hostapd/hostapd.conf
    else
        if [ "X$1" = "XPROD" ]; then
            echo "--Reconfiguring as PRODUCTION router (REBOOT required)!..."
            rm -f /etc/resolv.dnsmasq
            ln -s /etc/resolv.dnsmasq.PROD /etc/resolv.dnsmasq
            rm -f /etc/network/interfaces
            ln -s /etc/network/interfaces.PROD /etc/network/interfaces
            rm -f /etc/firehol/firehol.conf
            ln -s /etc/firehol/firehol.conf.PROD /etc/firehol/firehol.conf
            rm -f /etc/hostapd/hostapd.conf
            ln -s /etc/hostapd/hostapd.conf.PROD /etc/hostapd/hostapd.conf
        else
            echo "u:ERROR: Invalid usage! (sudo switchroute.sh TEST|PROD)!"
        fi
    fi
    ls -l /etc/resolv.dnsmasq
    ls -l /etc/network/interfaces
    ls -l /etc/firehol/firehol.conf
    ls -l /etc/hostapd/hostapd.conf
else
    echo "u:ERROR: This script must be run as root! (sudo switchroute.sh TEST|PROD)!"
    exit 1
fi
exit 0
|
| Now, to make the big switch, run the script as: sudo switchroute.sh PROD; then reconnect and reboot your router. Test to make sure you can connect to the internet through it and that your fellow household users can connect their devices to the new access point (you may need to change the SSID, authentication method, passphraise, etc. on each device – unless you are keeping the same setup identical to what you used on your old router). If something went wrong and it’s not a quick-fix, you may need to switch back to your old router and reconnect up as a subrouter for testing. This should be easy running the script as: sudo switchroute.sh TEST, reconnecting the WAN port back to one of your old router’s ethernet ports, and rebooting (Yes, I did have to do this once in the process). If you follow this and find I left something out, please be sure to comment on this post so I can correct this article! |
/END |